
If you use starty-stoppies (leaders-enders, jumpers, or whatever you like to call them) to begin and end your machine stitching, you should save them and make stuff! If you don't use starty-stoppies when you are sewing, you can make these wallets using scraps instead. Fold the scraps double so that you'll have more raw edges for texture.
I have one for folding money and a second one for business cards, credit cards, driver's license, etc. People often comment about my wallet, they make fun gifts, and they are good for using fabric leftovers. I also made a purse that was covered with starty-stoppies, but that's another story!
You'll need:
Base fabric, which is also the lining: 7” x 5”
Fabric for pockets:
Cut 2 small pockets, measuring 5” x 4.5” (fold to 5” x 2.25”, wrong sides together, and press)
Cut 2 large pockets, measuring 5” x 6” (fold to 5” x 3”, wrong sides together, and press)
Lightweight, fusible interfacing such as Pellon #931TD:
Cut one for base fabric, 7" x 5"
Cut 2 for small pockets, 5” x 2.25”
Cut 2 for large pockets, 5” x 3”
And, of course, a pile of starty-stoppies, or scraps that are folded double.
Instructions:
Fuse the 7" x 5" interfacing to the wrong side of the base fabric. Arrange the starty-stoppies on the interfaced side of the base fabric with at least 1/2" extending beyond the edge of the base fabric, as pictured in the first photo below. Overlap them a little to fully cover the interfacing and stitch them on, adding pieces as you go (the bobbin thread will show on the inside of your wallet, so choose a thread color that you like). I usually stitch in a grid pattern, which you can see in the second photo. Sometimes I have to add additional lines of stitching if I see that I didn't catch the edges of the starty-stoppies well enough. The stitching is pretty random and I don't plan it, I just start sewing and catch all the edges of the little pieces. After the interfaced side of the base fabric is fully covered, turn it over and trim the edges of the exposed starty-stoppies to 1/2" beyond the edge of the base fabric (see the third photo).
 |
| Overlap starty-stoppies and stitch until base piece is completely covered. |
 |
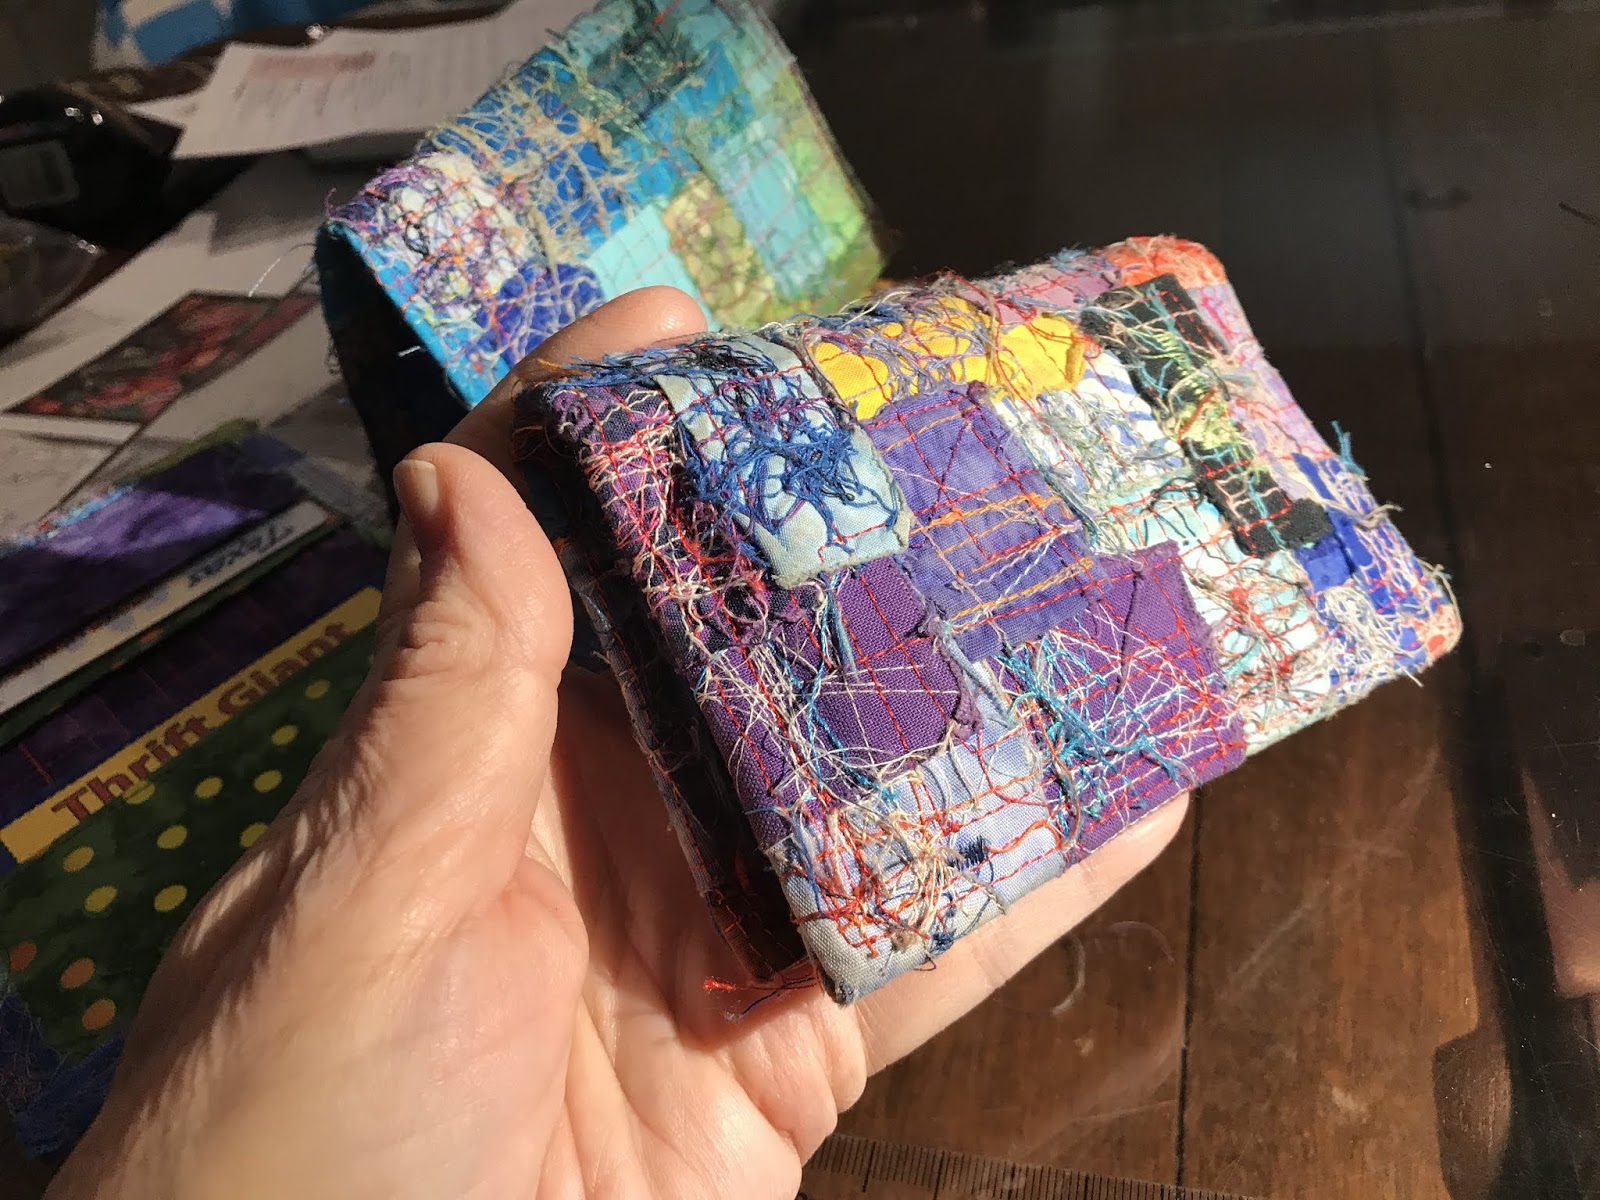
| Base fabric/lining completely covered (the aqua/blue/green one at the top). The one I am holding shows the inside of the wallet with the grid of sewing lines. |
 |
| Use a rotary ruler and cutter to trim the exposed starty-stoppies so that 1/2" remains beyond the edge of the base fabric. |
The wallet has four pockets--two large and two small. Place the pieces of interfacing inside the folded pocket pieces and press to fuse. Topstitch each pocket about 1/8" from the folded edge. Arrange the four pockets on the base fabric as pictured (large pockets go on first, with small pockets on top, raw edges are aligned with raw edges of the base fabric) and machine stitch the pockets in place. The bobbin thread will show on the outside of the wallet, so choose the thread color accordingly.


 |
| Enough pockets for two wallets (topstitched close to folded edge). |
 |
| Layer two pockets (a large and a small) at both ends of wallet. |
 |
| Large pockets go on first, small pockets on top of large, align raw edges, machine stitch close to edges. |
Fold the extra 1/2" to the inside, covering the raw edges of the base fabric and pockets. Stitch in place, going around the wallet at least twice for durability. The bobbin thread will show on the outside of the wallet, so choose the thread color accordingly. The last photo is the first one I made, and it is looking pretty ratty these days. I guess I should throw it in the laundry.
 |
| First round of stitching. |
 |
| Going around the corner. |
 |
| Three finished wallets. |

 |
| My old wallet. It has seen better days, but it has traveled many miles with me. |
.JPG)
.JPG)
.JPG)
.JPG)
.jpg)
.JPG)
.JPG)


